Your Cart is Empty
<< Worldwide shipping >>

Building a 26 Foot Diameter 6V Geodesic Dahlia Dome
I love dahlia flowers. There are 10,000 named varieties of dahlias, which originated with the Aztecs, and all modern varieties come from the few survivors brought in crates by ship from Mexico to Madrid in the early 1500’s. They are sensitive plants and require exactly the right amount of sunlight, just the right amount of water and nutrient rich rock-free soil. Especially in Southern California, they need to be shaded from our intense sunlight, and this necessity has mothered many shady inventions whose purpose was to grow better flowers.
Why Build a Geodesic Dome?
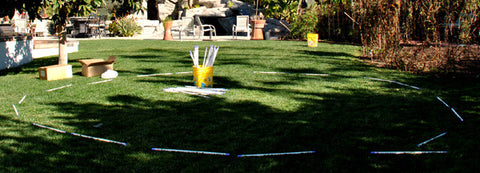
My reason to build a geodesic dome was to shade my dahlias. I wanted the dome to be big enough to hold not just a few flowers, but a whole bunch of them to make it worth my while. Measuring the space, I could just fit a 26’ circle in the corner of a fairly big yard.
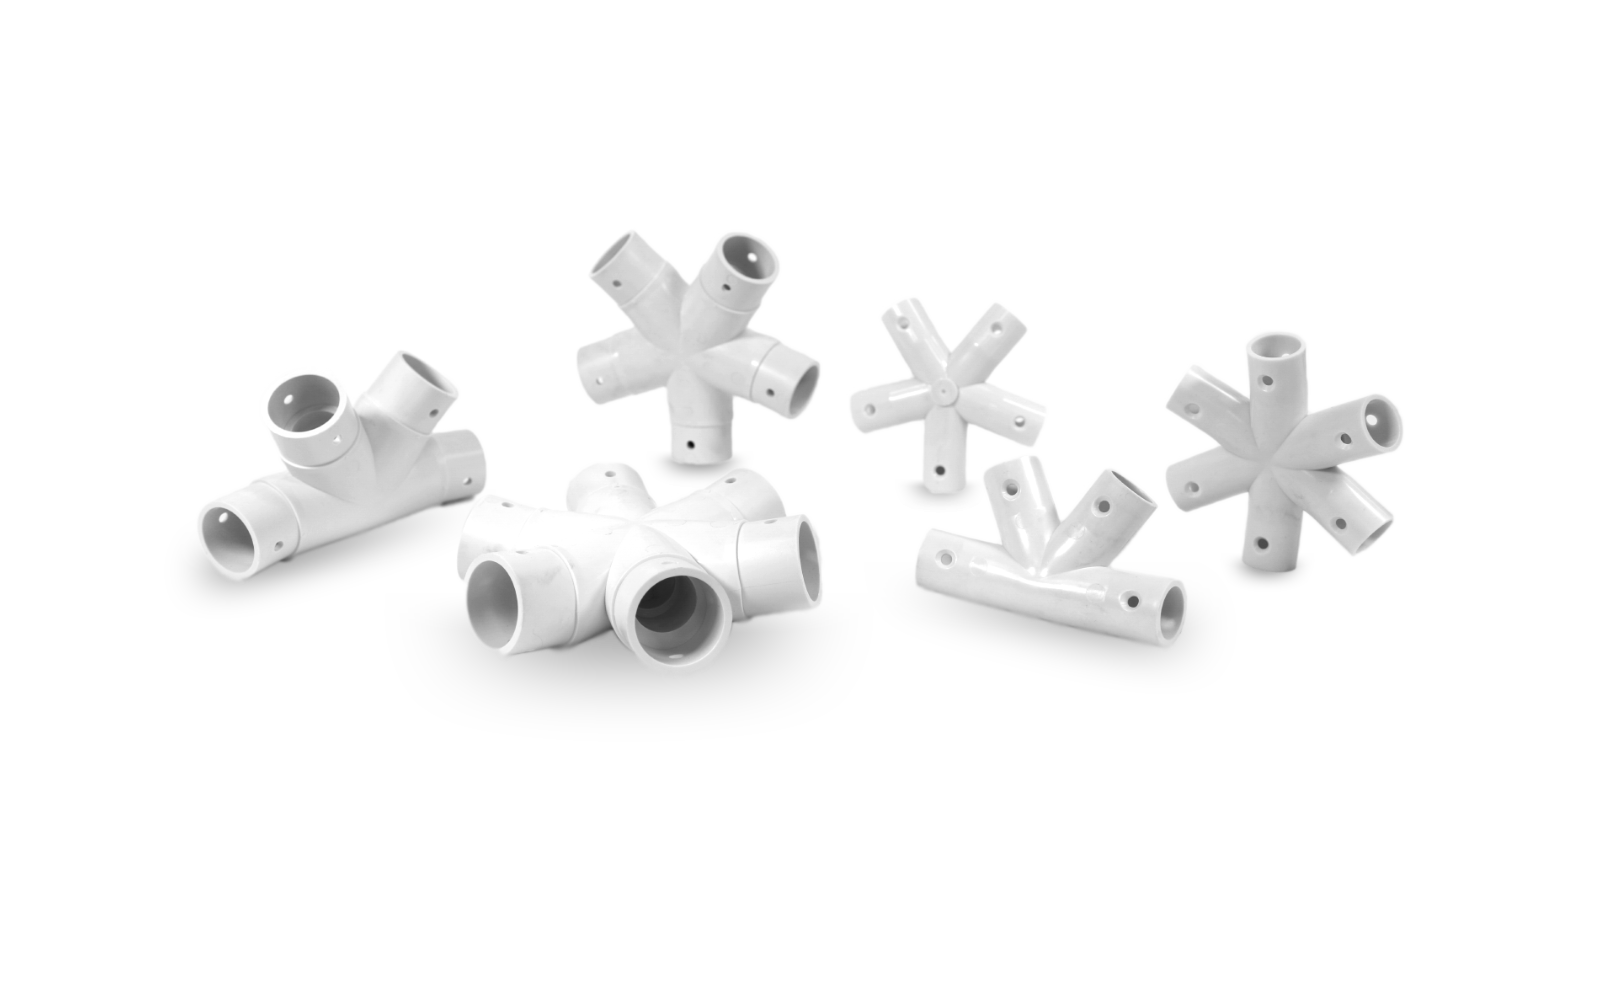
First of all, I knew I didn’t want to build a massive structure, so using lightweight, inexpensive PVC seemed logical. I did, however, want it to look impressive and structurally sound. Using the 6V Complete Geodesic Dome Kit, I was able to build the perfect 26 foot Dome for my Dahlias. The kit included all the tools and hardware required including the Hub Connectors, the custom cut PVC struts, and the nuts and bolts required to connect the hub connectors to the struts.
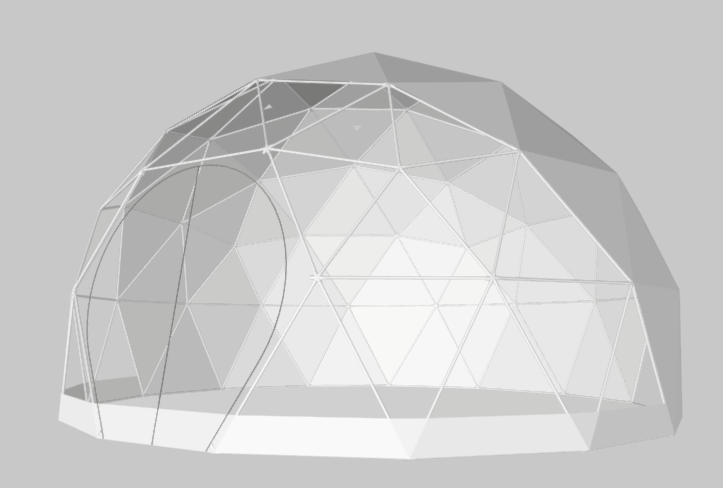
Basic geodesic dome kit and hub connectors
The basic kit from Sonostar includes all the 4-way, 5-way, and 6-way connectors needed for the project, plus spares. Using the Geodesic Dome Calculator on the website takes into consideration the size of the hubs themselves when computing the nine different lengths of pipe needed, so I set about cutting and color coding all my struts.
I was also pleased that they included a rubber mallet to nudge the struts into the hubs without breaking them, and color-coded maps to help me put all the correct color struts in the right places. Without that, it would have been impossible.
So, on the day after Christmas, I set out with all the pieces to build my geodesic Dahlia dome.
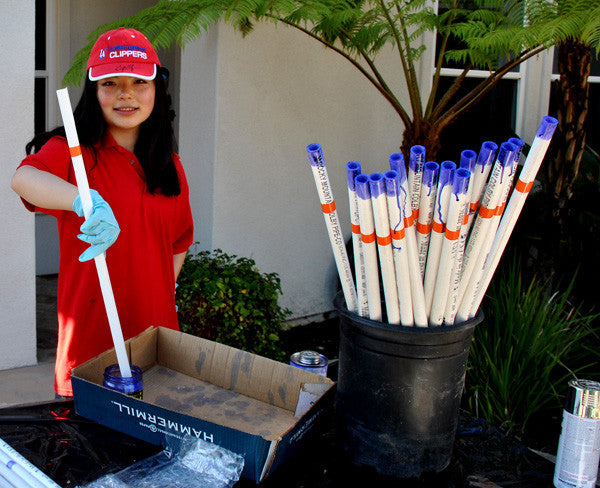
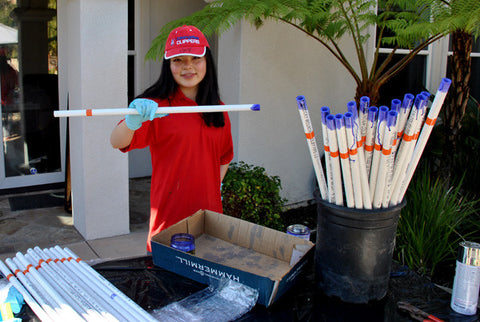
I found a fairly flat spot to set up in, and immediately recruited two college students who were staying with me to help. Irena’s job was to dip both sides of the struts in a jar of welding primer, and Beck was to help me follow the map so that I didn’t accidentally glue the wrong piece into the structure.
First, we laid out the base pieces in a circle.
Then we started gluing in the 4-star base hubs, making sure they were all curved inward. The pattern was pink-pink-turquoise, pink-pink–turquoise, so that was pretty easy.

The next step was to lay out the first row of struts that connect to the base ring. This is where it started to get a little complicated because the pattern includes a lot of different colors (which are different length struts). Quality Control is really important because once the joints are glued, they don't come off.

Here’s a small version of the map we used to guide us. We had put a colored piece of electrical tape about 4 inches from the end of each strut so we could visually see which was which.

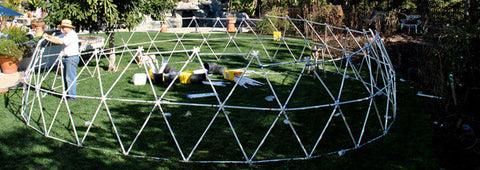
Once the row was all glued, we just repeated the process, row-by-row. We found it was helpful to wear disposable gloves because the glue gets really messy.

Using a rubber mallet makes the struts go in, but saves the ends from getting damaged. If you order a kit, they send one with it.
Just don't go on auto-pilot. It's REALLY easy to grab the wrong color strut or get out of order. Always check twice before you glue.

Because you're using both 5-way and 6-way hubs, and there are 9 different size struts, the rows at this stage look really wonky. You just have to trust the math and eventually it all worked out.
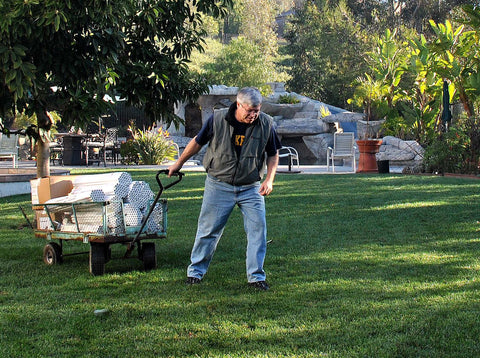
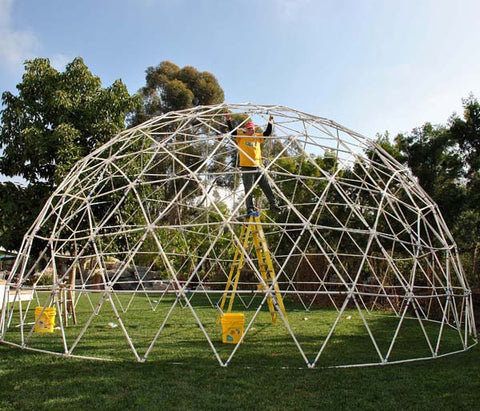
We started using a stepladder here.


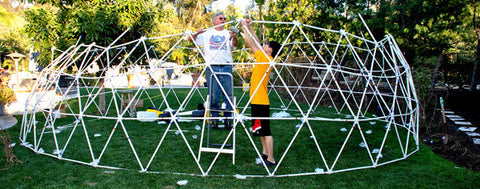
As we got to the upper levels, we had to start using a ladder.
The symmetrical patterns were all coming together, and we got to the point where we only had a few pieces to go.

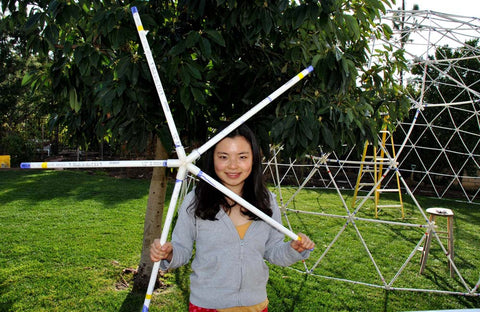
The final piece was a 5-star hub connected to its yellow-coded struts. We figured it was a lot easier to put it together on the ground and then just glue it into the 5 empty holes up above. I think we were right.
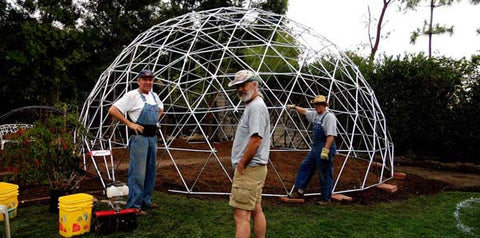
The geodesic Dahlia dome couldn’t live on the grass where we built it, so three of us carried it into its final position in the corner of the garden where I wanted to plant my dahlias. By this time, I had painted the entire dome with chrome colored paint, to protect the PVC from ultraviolet rays, and also because it looks really cool.
What about a door? One nice thing about PVC is that you can just make a door out of four pieces of PVC, then cut it into the dome where you want to put the door, and using off-the-shelf elbows and tees, glue the door in.
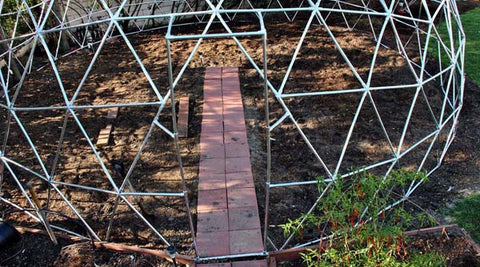
The door is about 6’ high and corresponds to the 4th ring level. It’s flush at the bottom and sticks out at the top because of the curvature of the dome. You can see at mid-door where I cut into the struts and inserted tees to tie both sides. The width is 2’. This corresponds more to the bricks than anything else. 2 bricks wide is 2 ft. wide.
So how about a Geodesic Dome cover? I went to a Military Surplus website and ordered a parachute since the inflated shape is the same shape as a dome. I didn’t want it to go all the way to the ground, or it would get too hot inside, so I found one that covered about the top 1/3, kind of like a yarmulke.

And I know the question everyone is asking: “How did the dahlias grow?" Marvelously, thank you very much!
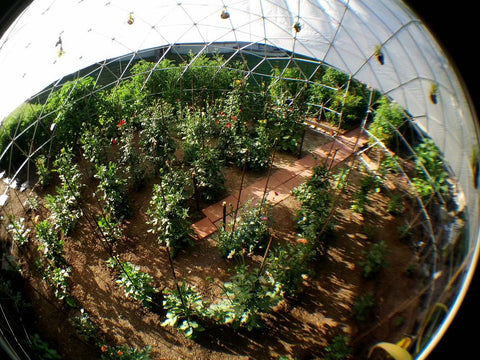
Shot using a fisheye lens inside the dome. The dahlias were planted in a circular pattern with rebar stakes. The path leads out to the door. Tomatoes are planted all around the outside of the dome.
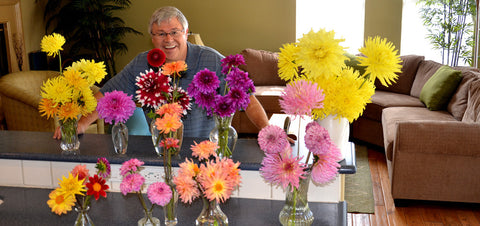
The finished product. A happy gardener, because his dahlias were happy, and they produced an amazing amount of flowers that made everyone else very happy.


hqitohatpv
March 11, 2021
Muchas gracias. ?Como puedo iniciar sesion?